Today we’re thrilled to announce a major update to Dropzone 4 that is now available as a free update to all Dropzone 4 Pro users. If you’re new to Dropzone, this feature is also included as a part of a 14 day free trial when you download Dropzone 4.
If you already use Dropzone’s Drop Bar to gather files from across different apps, you’ll know how handy it is for staging a group of files before acting on them. Dropzone has just received a major update that makes Drop Bar even more powerful: you can now pop it out into a dedicated floating window that stays visible above all other windows. There’s a video to take you over how this feature works that you can watch above.
A Quick Refresher: What Drop Bar Does
If you haven’t used Drop Bar before, here’s a quick refresher of how Drop Bar works in Dropzone 4:
- You can drag files from different locations into Drop Bar and it keeps references to them so you can drag them into other apps, onto a Dropzone action or anywhere in Finder.
- You can combine files in Drop Bar into stacks so they travel together by dragging files in Drop Bar onto each other.
- You can rename a stack, preview with Quick Look and lock files in Drop Bar so they stay in Drop Bar after dragging elsewhere.
- You can reorder items in Drop Bar by dragging them around within Drop Bar.
- When you’re ready you can drag the Drop Bar the stack onto your destination which can be:
- A Finder folder to move or copy the originals (hold option to copy instead of move)
- Any app that accepts file drags
- Any Dropzone action
What’s New: A Detachable Floating Drop Bar Window
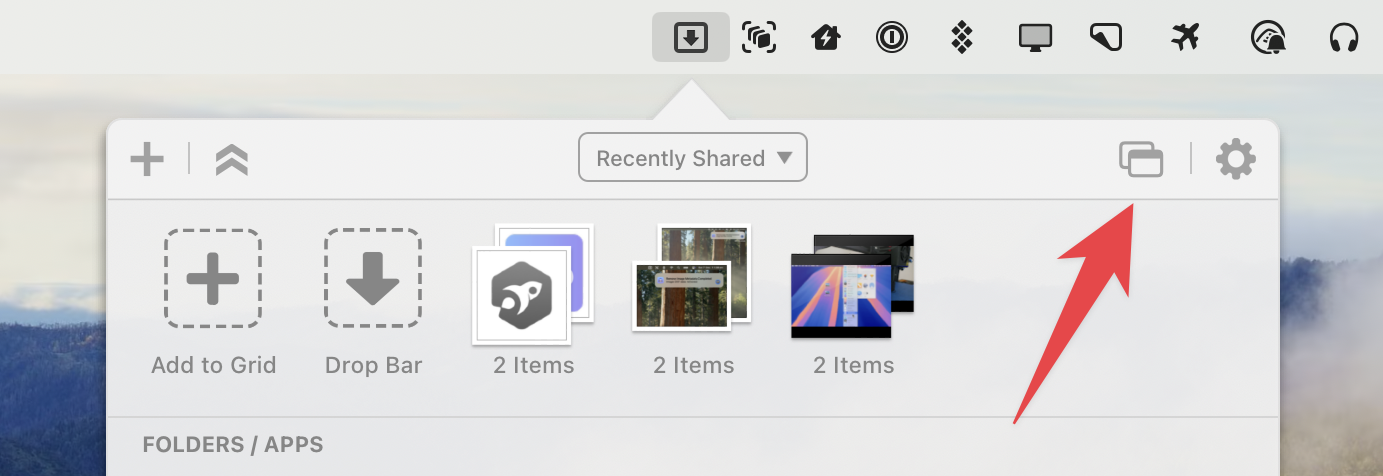
Click the new “Pop Out Drop Bar” button in the Dropzone grid and you’ll get a compact, always-on-top window that show the files you currently have in Drop Bar.
- You can position this floating window anywhere on screen and it will remember its last position across launches.
- Drag files straight onto the window from Finder, the desktop, or any other app.
- The files stay visible on screen in the floating Drop Bar.
- When you’re ready you can drag individual files or whole stacks out again—into a folder, into an app or onto a Dropzone action.
Floating Drop Bar Usage Examples
The floating Drop Bar mirrors the items in the main Dropzone grid but allows you to keep them visible and ready for dragging elsewhere without reopening the main Dropzone grid each time. Here are a few examples where the floating Drop Bar can save you a bunch of time:
| Everyday scenario | How the floating Drop Bar helps |
|---|---|
| Collecting file for a project that are spread across Downloads, Slack, and the web | Drag the files as you find them into the floating Drop Bar, then AirDrop the full set at once once you have everything you need. |
| Moving scattered project files into a new folder structure | Stage files in floating Drop Bar as you find them; then drag the stack into the final Finder folder when you’re ready. |
| Frequent operations on the same files (such as resizing, converting, uploading or emailing) | Drop files into the floating Drop Bar window, lock them in the Drop Bar stack by right-clicking on a stack and choosing “Lock Items,” then drag the files onto a Dropzone action or into an app. The items stay in Drop Bar so you can reuse them multiple times. |
| Temporary file “clipboard” while working with files for a current project | Keep the files you need visible in the floating Drop Bar instead of opening multiple Finder windows. |
Try Out Floating Drop Bar
To use the floating Drop Bar, first update Dropzone from the ‘Updates’ tab in Settings (or download the latest version from our home page). You can then open the floating Drop Bar by opening the Dropzone grid and clicking the new “Pop Out Drop Bar” button:
We think you’ll find it hard to go back to the old ways of juggling dozens of Finder windows.
Give it a spin and as always if you have any feedback or questions, email us at support@aptonic.com.