Dropzone 5 has come a long way since it launched in March. There have been 10 updates since then, each bringing new features and functionality.
With the release of 5.1.0 we thought it would be a great time to showcase some of our favorites. Let’s dive in.
Automatically add screenshots to Drop Bar
This is the headline feature of the just released 5.1.0 update. There’s a new Drop Bar section in Dropzone’s Settings that brings all the Drop Bar related options together in one place, and it includes a powerful new capability: Dropzone can now watch your screenshots folder and automatically add new screenshots to Drop Bar.
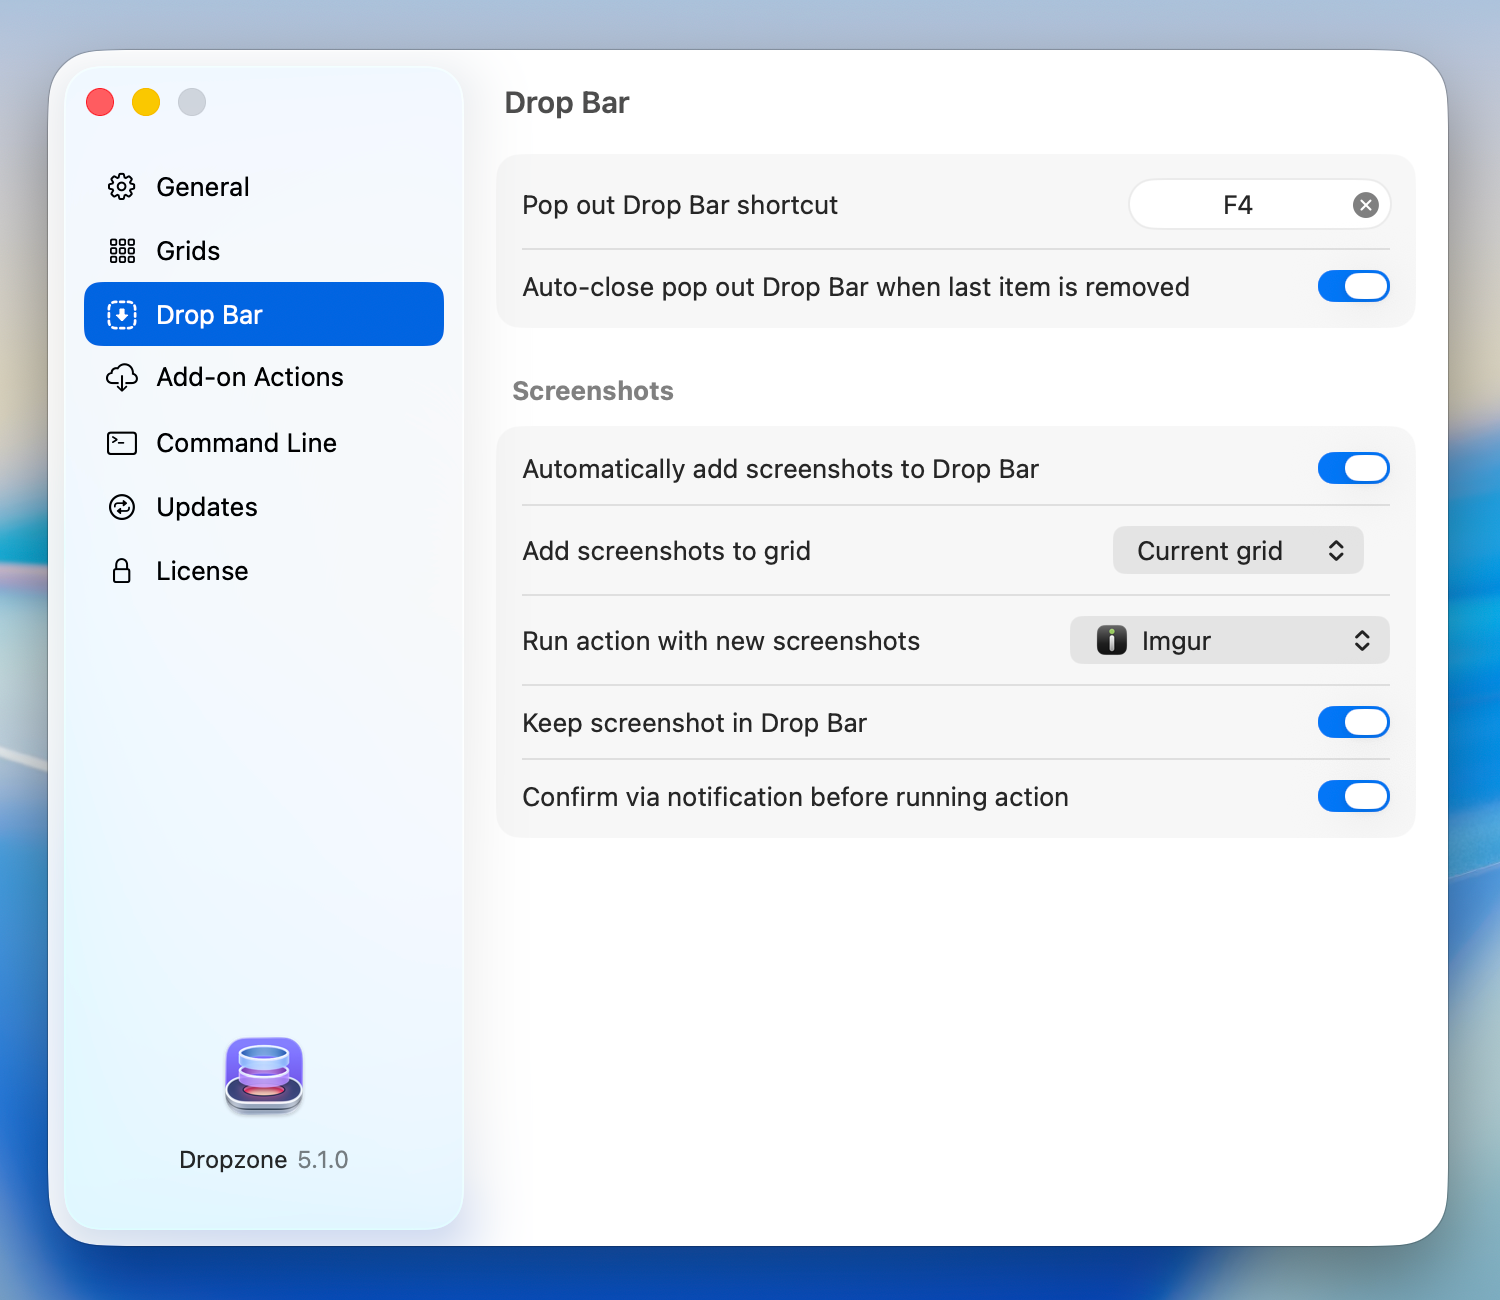
Just enable ‘Automatically add screenshots to Drop Bar’ and every screenshot you take gets added to Drop Bar, ready to drag into an email, AirDrop, or anywhere else. You can choose which grid screenshots get added to, or leave it set to ‘Current grid’ to have them added to whichever grid you’re currently using.
But it gets better – you can also set an action to run automatically on every new screenshot using the ‘Run action with new screenshots’ option. Pick any action from your grid and Dropzone will run it each time a screenshot is taken. Some useful workflows:
- Run the Imgur action to instantly upload each screenshot and get a shareable link on your clipboard
- Run the Resize Images action to automatically scale down retina screenshots before sharing
- Run the Remove Image Metadata action to strip metadata before a screenshot goes out into the world
By default, Dropzone shows a notification before running the action so nothing happens unexpectedly – just click on the ‘Run’ button in the notification to run it.
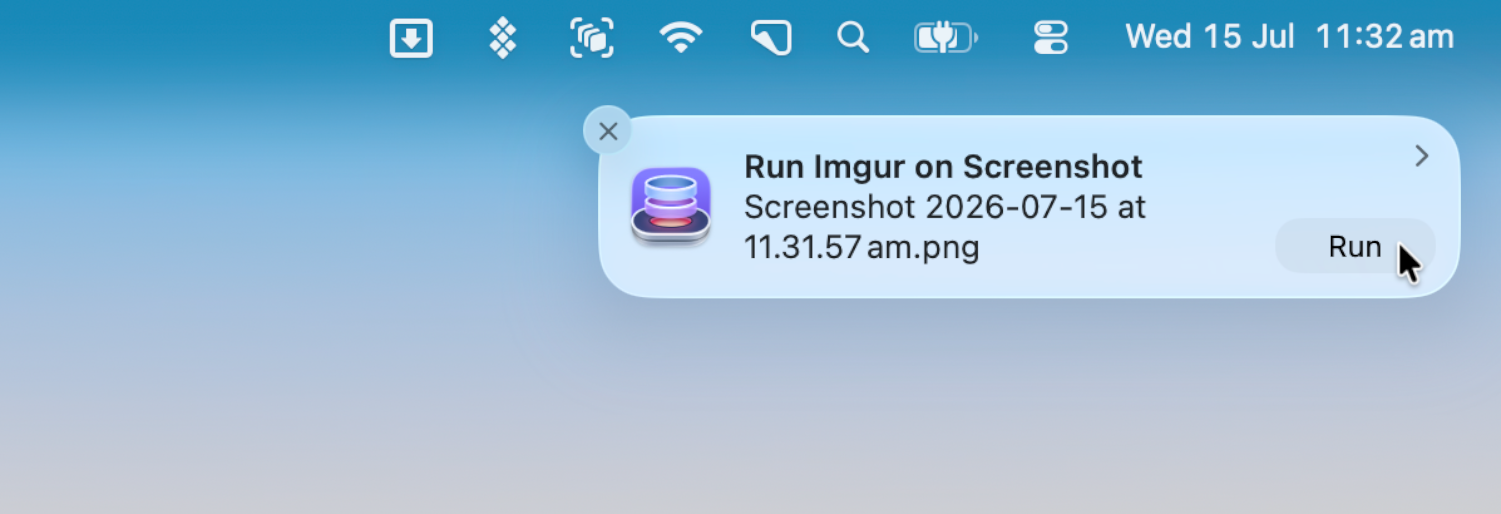
If you’d rather have the action run instantly on every screenshot, you can turn off ‘Confirm via notification before running action’ in the Drop Bar settings. There’s also a ‘Keep screenshot in Drop Bar’ option that controls whether the screenshot stays in Drop Bar after the action has run.
The new Drop Bar settings section also now includes an option to automatically close the popped out Drop Bar when the last item is removed from it. This makes the floating overlay even more useful – once you’ve finished with your files, it immediately disappears rather than taking up screen space.
New Grid Editing in Settings
Grid editing in the Settings > Grids tab has been completely redesigned. Double-clicking a grid (or selecting it and clicking Edit) now opens a new grid options editor:
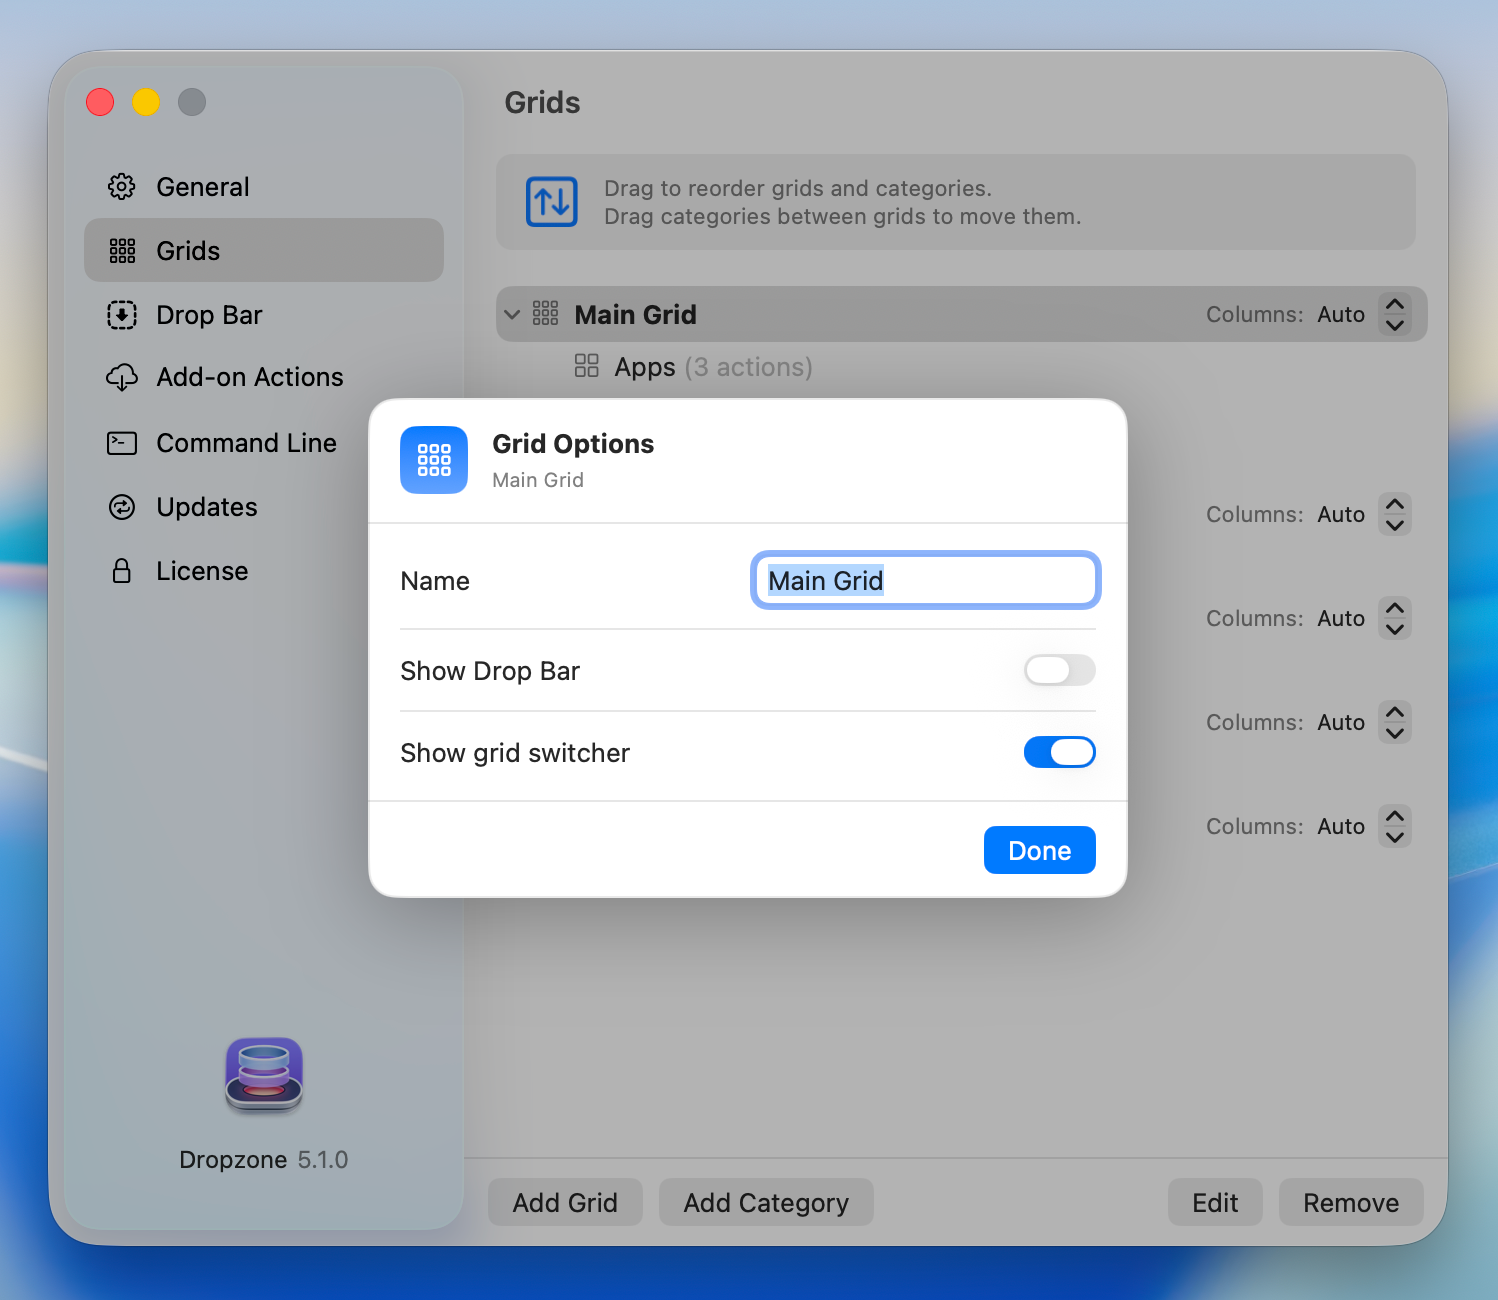
From here you can rename the grid, and there are two new per-grid visibility options: ‘Show Drop Bar’ lets you hide Drop Bar on grids where you don’t need it, and ‘Show grid switcher’ lets you hide the grid switcher at the top of a grid. These are handy if you want a clean, minimal grid that only shows your actions.
Faster Grid Switching
Switching between grids is now much faster with two new sets of keyboard shortcuts. With the grid open, you can press the left and right arrow keys to instantly flick between your grids. You can also jump straight to a specific grid with ⌘1 through ⌘9 (and ⌘0 for the tenth grid).
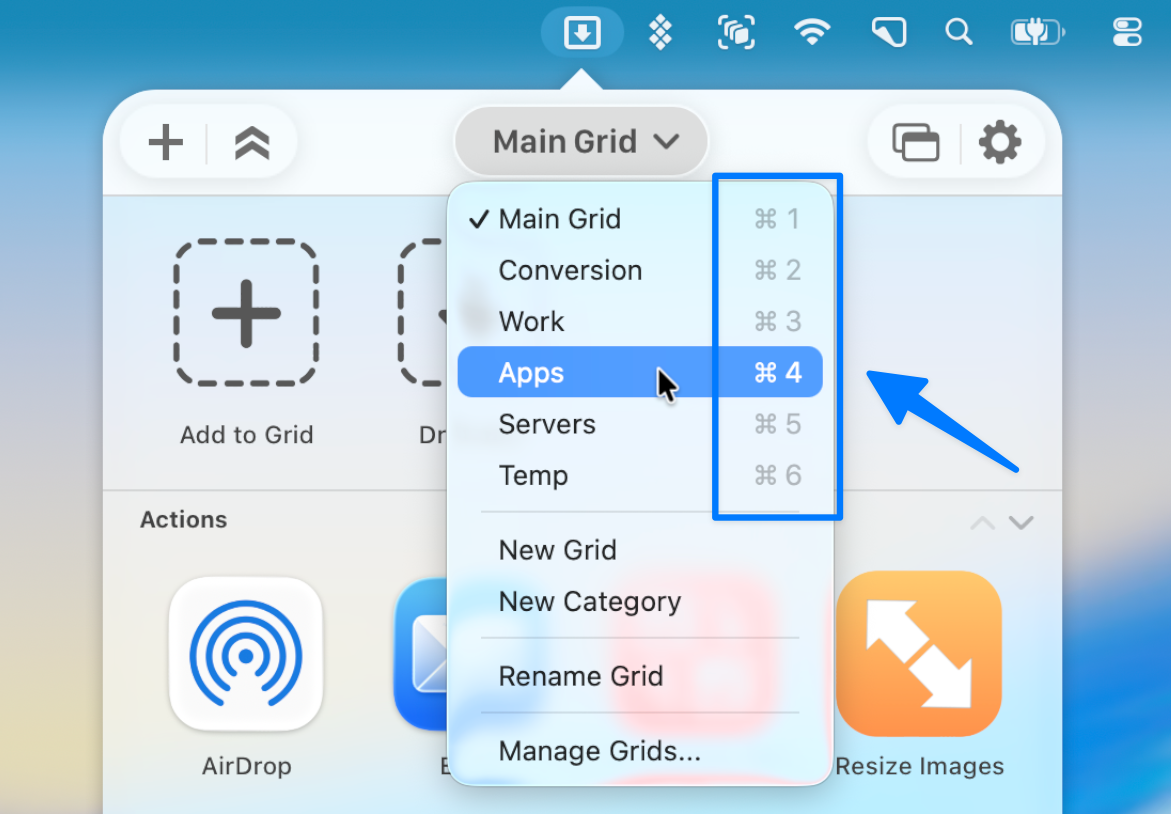
Best of all, these shortcuts work while you’re dragging files. So you can pick up a file, summon the Dropzone grid, hit ⌘ and the grid number to jump straight to the grid you need, and drop the file on an action – all without interrupting your drag.
New Open File Action
Dropzone grids have always been able to hold folders, apps, and actions – and now they can hold files too. The new Open File built-in action lets you add any file to your grid and open it in its default application with a single click.
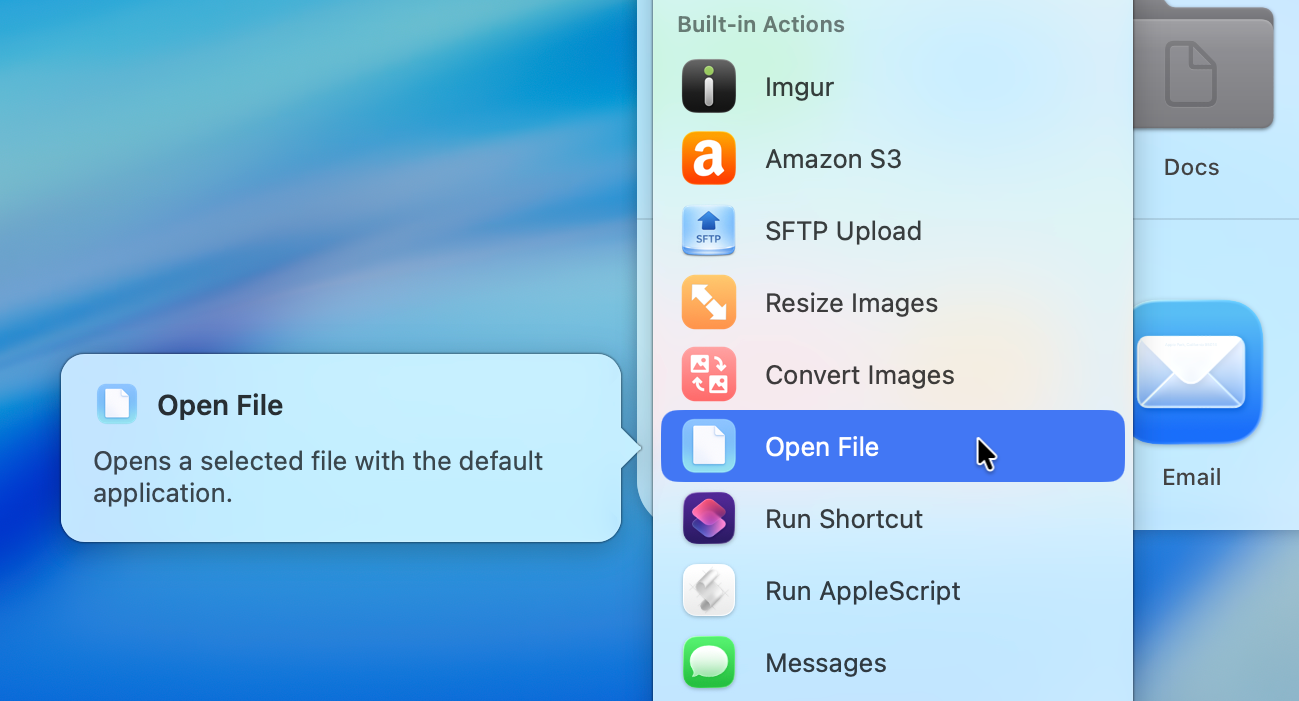
The easiest way to use it is to simply drag a file onto the Add to Grid area, just like you would with a folder or an app. You can also add it from the add action menu. It’s perfect for that spreadsheet, design file, or notes document you open twenty times a day.
Drop Bar Tooltips for Long File Names
Drop Bar items with long file names get truncated to fit in the grid, which previously meant there was no way to see the full name of an item without using Quick Look. Now you can simply hover over any truncated Drop Bar item and a tooltip appears showing the full name:
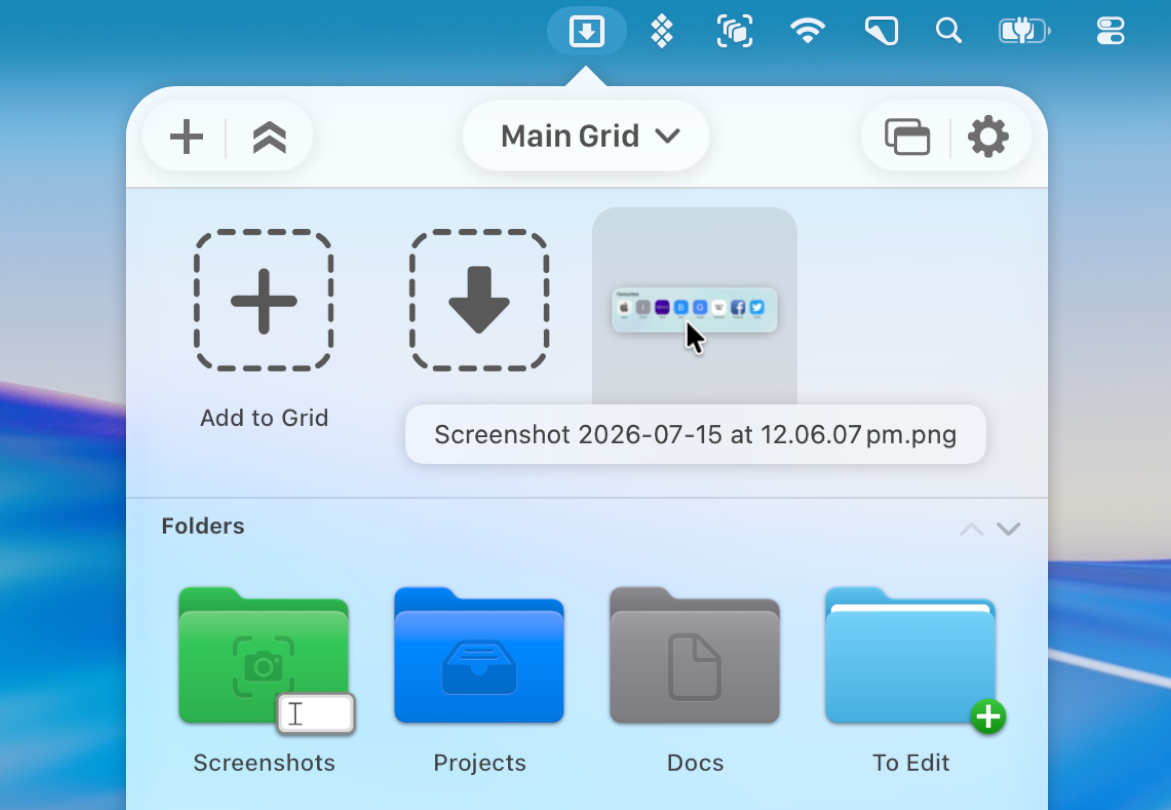
It’s a small thing, but if you keep a lot of files staged in Drop Bar it makes it a lot easier to find the file you need.
Tons of Command Line Tool Improvements
When we first introduced the dz command line tool, you could run actions and manage Drop Bar from the terminal. Over the last few updates, dz has grown into a full remote control for Dropzone. The three biggest additions:
You can now add actions to your grid from the command line. Use dz list-action-types to see what’s available, dz action-info to see an action’s configuration options, and dz add-action to add it to a grid, fully configured. For example, here’s how to add a Resize Images action:
dz action-info "Resize Images"This shows the options the action supports:
Resize Images
-------------
Resizes dropped images to fit within a given width and height.

Can also reduce image file size when outputting to JPG or WEBP by changing image quality.

Options (set with --set key=value):
  output_width (optional)
    Maximum output width in pixels
  output_height (optional)
    Maximum output height in pixels (at least one of width/height required)
  output_quality (optional, default: 100)
    Output quality 0-100 (applies to JPG and WEBP)
  output_format (optional, default: 0)
    Output image format: 0=JPG, 1=PNG, 2=TIFF, 3=WEBP
  output_folder_option (optional, default: 0)
    Where resized images are written: 0=same folder, 1=ask each time, 2=pre-selected folder, 3=Drop Bar
  ...
Then add the action with your chosen configuration:
dz add-action "Resize Images" --name "Resize to 1200px" --set output_width=1200 --set output_format=JPGThe action instantly appears in your grid, ready to use. This works for built-in actions, add-on actions, and even your own custom actions.
You can move actions around from the command line. The new dz move-action command lets you move any action into a different category, or even a different grid entirely:
dz move-action "Resize to 1200px" --category "Image Tools" --grid "Work"You can configure grid settings from the command line. The new dz grid-settings command lets you view and change a grid’s name, column count, icon size, and Drop Bar/grid switcher visibility:
dz grid-settings "Work" --cols 4
dz grid-settings "Work" --drop-bar hide
There’s plenty more too: you can install and uninstall add-on actions (dz install-action), create and remove grids and categories, set custom icons for actions (dz set-icon), name Drop Bar stacks as you create them, and check on or cancel running actions. Type dz help after updating to see everything that’s new.
All of these CLI additions makes Dropzone perfect for agentic workflows. Since grids and actions can be created and configured entirely from the command line, you can have an AI agent like Claude Code set up Dropzone for you – just describe what you want and it can build a complete grid of pre-configured actions by running dz commands.
Now Localized into Italian and Japanese
Dropzone 5 is now fully localized into Italian and Japanese. These join English, German, French, Korean, Polish, Thai, and Simplified Chinese, bringing Dropzone to nine languages.
Get the Latest Version
All of these features and more are included in Dropzone 5.1.0, which is a free update for all Dropzone 5 users. You can see everything that’s changed in the full release notes.
To update, open Dropzone’s Settings and head to the Updates tab, or download the latest version from our home page. Some features, like automatic screenshot handling, require Dropzone 5 Pro – you can try Pro free for 14 days. We have also extended the launch discount, so now is a fantastic time to get Dropzone 4 Pro with a 30% discount.
We’ve got plenty more planned for Dropzone 5. If you have any feedback or questions, feel free to drop us a line at support@aptonic.com.