Today we have released a new “Create Apple Note” action for Dropzone 4. Simply drag files or images onto the action, and a new note will be created in the Apple Notes app with those items attached. You can also choose a specific Notes folder when you setup the action. This allows you to add multiple instances of the action to your Dropzone grid—with each pointing to a different folder—so you can simply drop items onto the one you want and have new notes created for you in the correct folder. (Check out the video above to see this in action)
Installing the “Create Apple Note” Action
To start using the Apple Notes action, first make sure you’ve updated to the latest version of Dropzone. If you’re new to Dropzone, you can download the latest version here.
Once you have the latest version of Dropzone 4 installed, adding the action is easy:
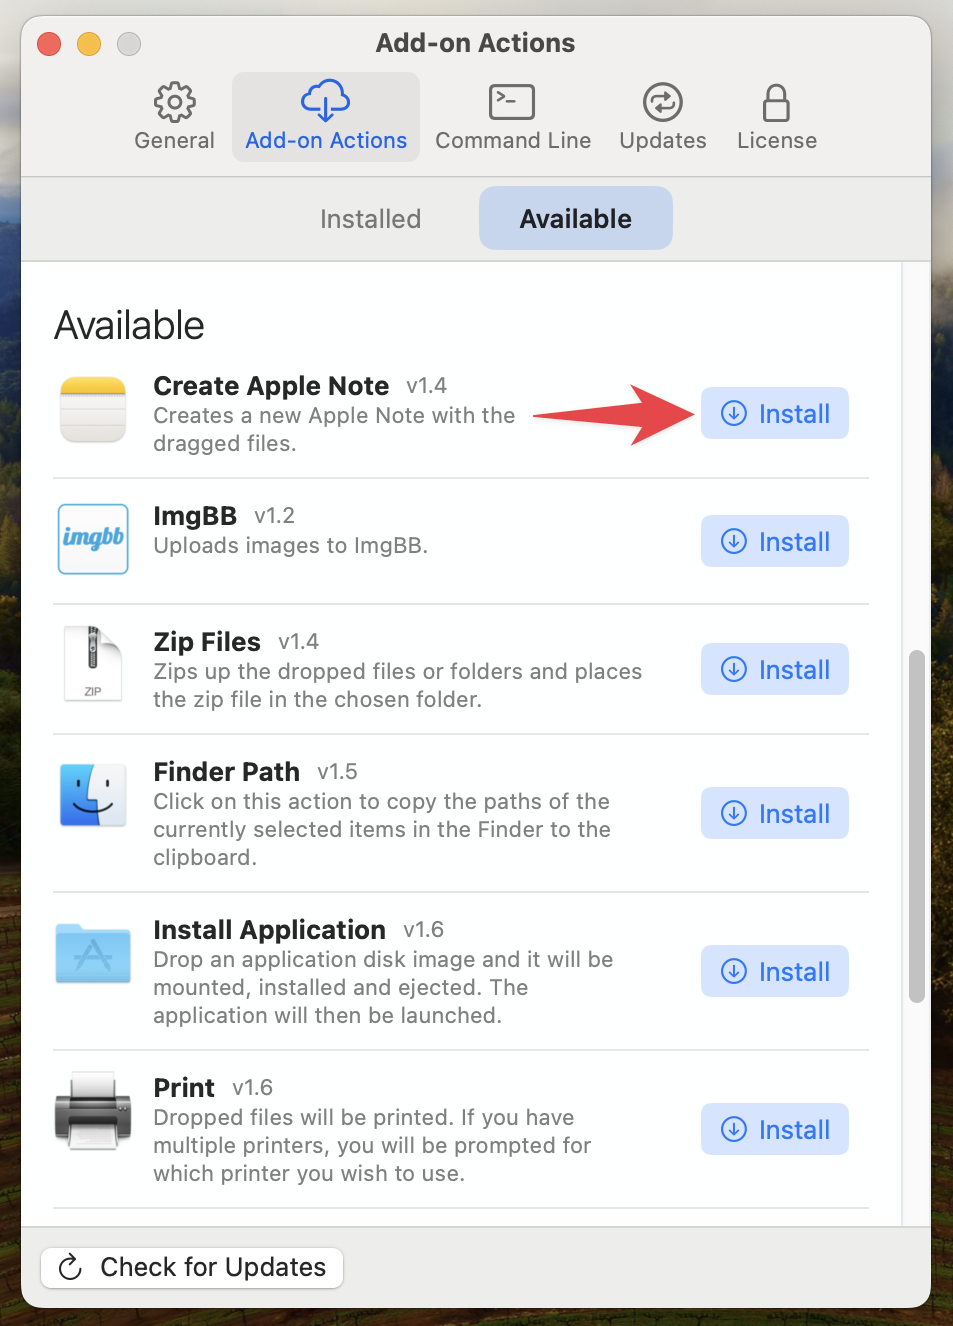
1. Open Dropzone 4’s settings and go to the Add-on Actions tab. In the Add-on Actions list, find the entry for Create Apple Note.
2. Click the Install button next to “Create Apple Note.” Dropzone will download and add the action to your grid. (See the screenshot below for reference.)
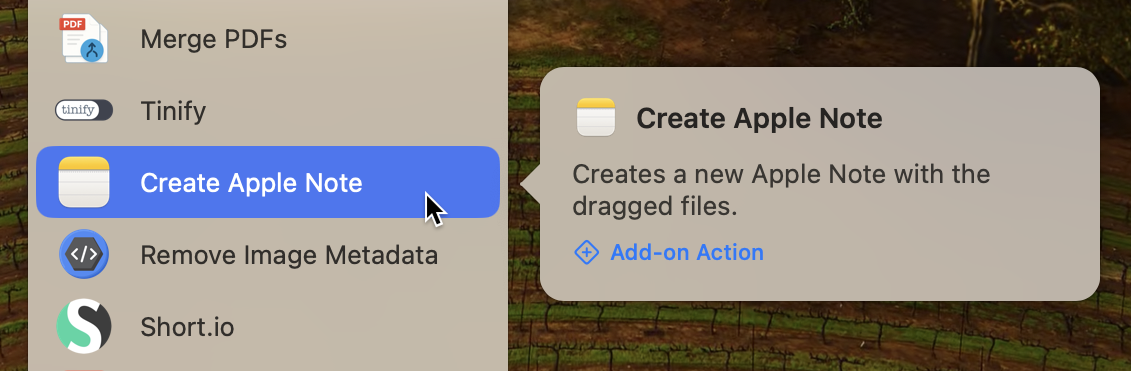
3. Configure the action. After installing, click the ‘Add to Grid’ button in the dialog that appears. You can also add it by clicking the white plus icon in the top left of the Dropzone grid and choosing ‘Create Apple Note’ from the Add-On Actions section of the menu:
A configuration window will appear. Here you can choose which Apple Notes folder the new notes should go into. You can leave this set to your default “Notes” folder or any custom folder you have setup. (The screenshot below shows this configuration step.)
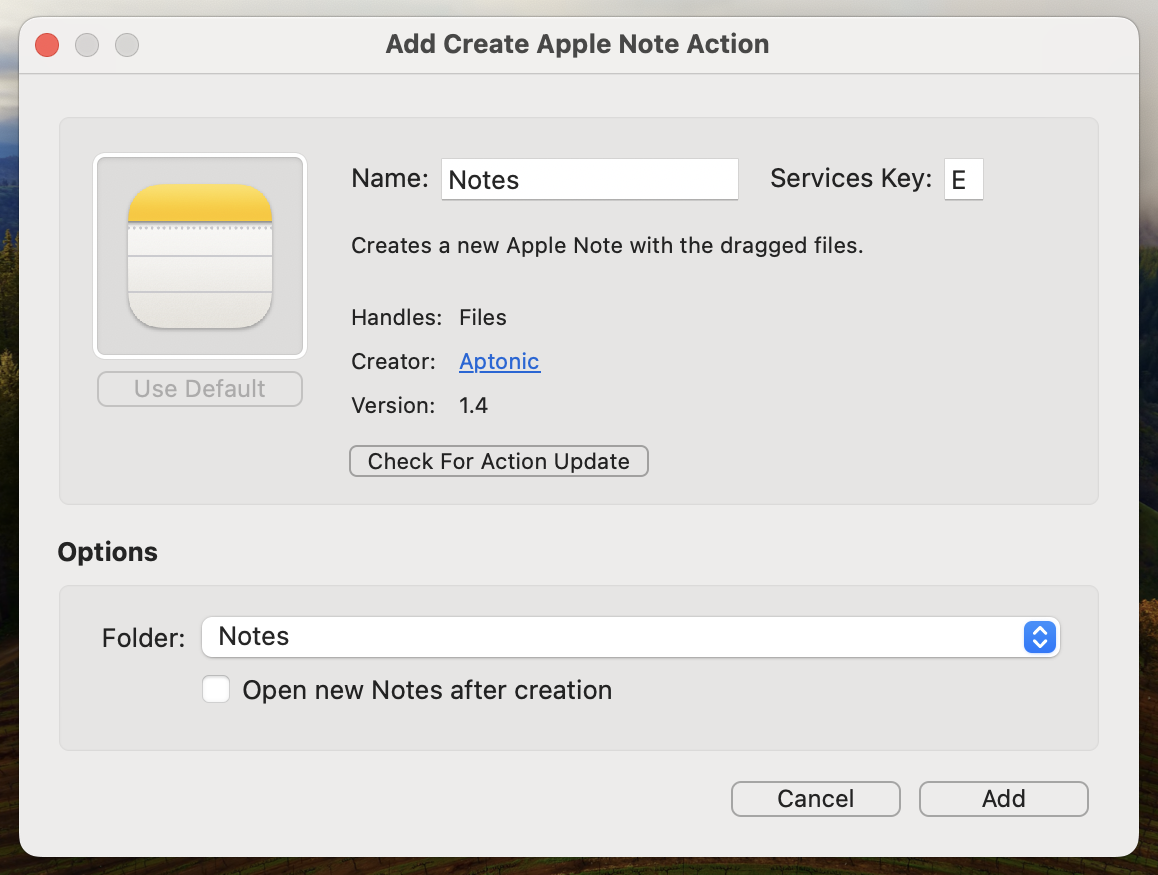
4. Finish up. Once you’ve selected a folder and clicked the ‘Add’ button, the Create Apple Note action will be added to your Dropzone grid, ready to use.
Using the Apple Notes Action
1. Drag one or more files onto the “Create Apple Note” action in your Dropzone grid (just like you would with any other action). You can drop images, documents, PDFs – any files you want to store in a note.
2. Dropzone will create a new note in Apple Notes in the folder you specified during setup. The note’s contents will include all the files you dropped. If you dropped multiple items, they’ll all be attached in a single note (images will appear inline; other file types will show as attachments).
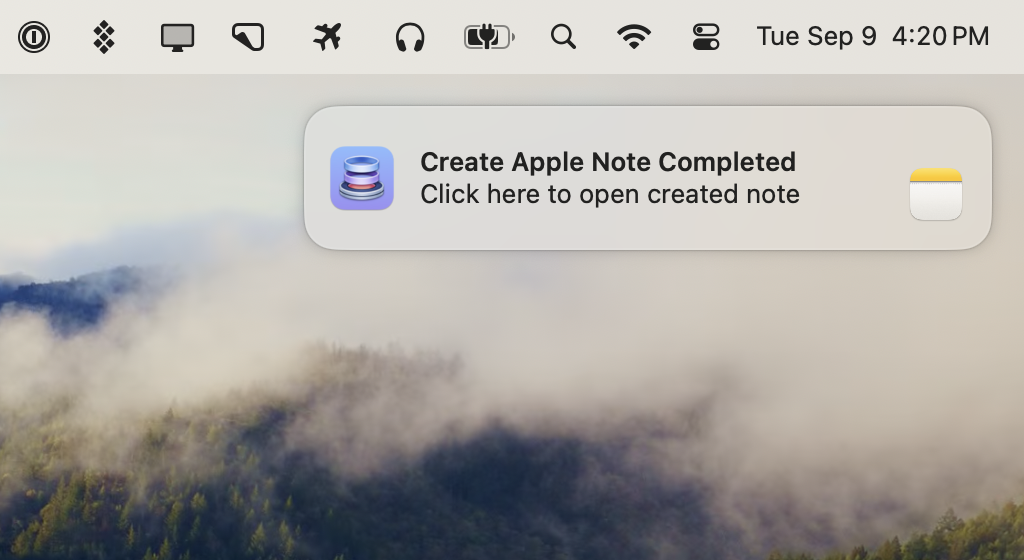
3. Look for the notification. After the note is created, Dropzone will display a notification letting you know it succeeded. If you’d like to view or edit the note immediately, just click the notification and your newly created note will open in the Notes app.
This Apple Notes action means you can, for example, collect research files or snapshots into Apple Notes without leaving your current app. Just drag them to Dropzone and they’ll be waiting in Notes for you, organized in the folder you chose. It’s a great way to quickly save receipts, inspiration images, or any bits and pieces to Apple Notes for later reference.
We hope you enjoy the new Create Apple Note action and that it helps make your workflow even smoother. As always, if you have any feedback or questions, feel free to drop us a line at support@aptonic.com.
Note: This action requires the non-Mac App Store (direct download) or Setapp version of Dropzone 4 due to sandboxing restrictions on the Mac App Store version. You need a Dropzone 4 Pro license or subscription to install add-on actions such as the Create Apple Note action. We hope you’ll consider supporting continued development and new actions like this by purchasing a Dropzone 4 Pro lifetime license or a subscription.